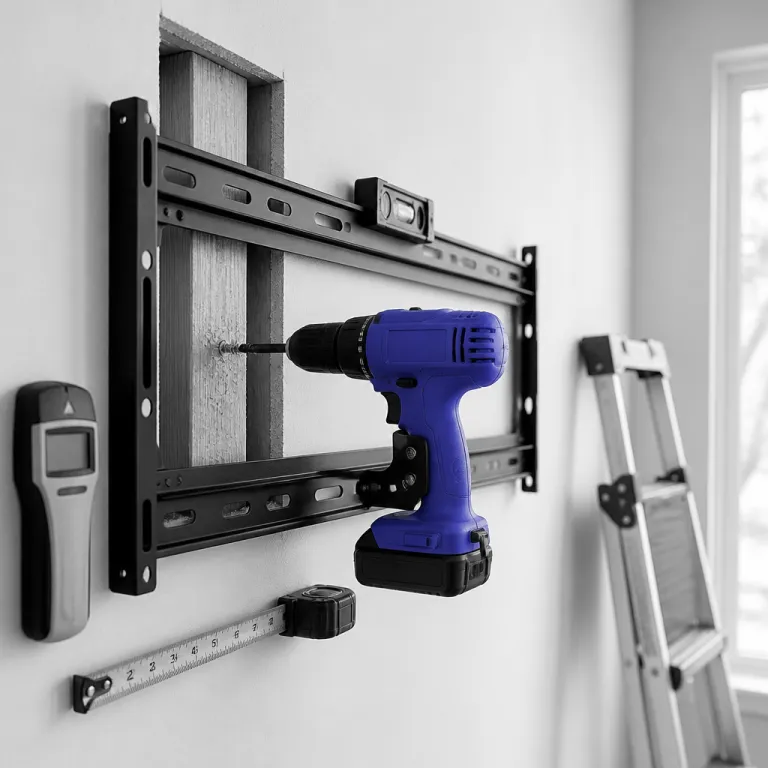
Why TV mounting is the gateway cordless drill project
Mounting a TV on a wall with a cordless drill is the project that finally makes the tool feel essential. When you follow a clear mount TV with cordless drill guide, you learn how studs, drill bits, and lag bolts actually behave in real wood instead of just in marketing copy. That first successful mount wall job turns a plastic case of tools into something you trust every time you hear a loose hinge or see a sagging shelf.
Most people either pay someone to mount a wall mount or gamble on plastic anchors in drywall, and both options hide the simple physics that keep a heavy screen from crashing down. A proper mounting plan starts with the wall type, because a hollow drywall partition with metal studs needs very different bolts and drill holes than a solid brick concrete wall behind a fireplace. Once you understand how to read the wall, your cordless drill set stops being a mystery and becomes a precise instrument for safe, repeatable work.
Think of this as driver’s ed for your drill, not just a one off task. You will use the same tape measure, stud finder, drill bit selection, and level technique on every future project that involves screws and holes with real consequences. A careful mount TV with cordless drill guide also teaches you how to feel the difference between a pilot hole in soft pine studs and a stubborn bite into brick concrete that really needs a hammer drill mode.
For American DIYers, the usual cordless drill set short list is DeWalt 20V Max kits like the DCK283D2, Milwaukee M18 combos such as the 2997-22, and Makita 18V LXT sets like the XT269M. Any of these will drive lag bolts into wood studs for a wall mount, but the way their clutches slip and their chucks hold different drill bits will change how confident you feel on a ladder. The goal is not just to own a drill with a big torque number, but to own one that still drives the tenth lag at the end of a long mounting day without smoking the motor.
TV mounting also forces you to think about cable management instead of just getting the bracket on the wall. Planning where each wall cable will run, and how it will exit near an outlet or media console, keeps you from drilling random holes with no path for the cable. Once you have routed one clean cable set behind a full motion wall mount, you will never again accept a tangle of cords drooping from a screen.
Studs, drywall, and the only safe way to hold real weight
The single rule that matters most is this: any TV over roughly 14 kilograms must be anchored into studs, not just drywall. A hollow drywall panel has almost no pull out strength for heavy loads, while a wood stud or properly fastened metal studs can safely hold lag bolts that bite deep. Every serious mount TV with cordless drill guide starts with finding the stud, not opening the drill case.
There are three common ways to locate studs behind a wall, but only one that deserves your trust. The knock test and magnet trick can hint at where a stud might be, yet a modern electronic stud finder that reads density changes is the only method that consistently lands your drill holes in the center of the stud. Run the stud finder slowly across the wall, mark both edges of each stud with painter’s tape, then split the difference with a pencil line where your wall mount will sit.
Once you know where the studs are, you can match your hardware to the wall type with confidence. In a typical wood framed wall with 16 inch on center studs, use 8 or 10 millimeter diameter lag bolts that penetrate at least 50 millimeters into solid wood, and never rely on the small screws that ship with many wall mounts. For apartments with metal studs, you will need specialized toggle bolts or heavy duty anchors rated for the TV weight, because standard lag bolts cannot cut proper threads in thin steel.
Drywall alone is only acceptable for very small screens on articulating or fixed wall mounts that explicitly list hollow wall ratings, and even then you should read the fine print. Plastic expansion anchors that come in a generic hardware set are not designed for the leverage of a full motion arm that extends far from the wall. When in doubt, choose a wider mounting plate that can span two studs and give you more holes with real wood behind them.
Before you ever squeeze the drill trigger, scan for hazards behind the wall. Many stud finder models now include a live wire detector that can warn you about electrical cables, but you can also buy a dedicated finder that flags both wiring and plumbing. Skipping this step is how people end up driving screws into a water line or nicking a wall cable that feeds an outlet, and those mistakes turn a simple mount wall project into an emergency repair.
If you want to build more confidence with your cordless drill set before tackling the TV, practice on scrap wood. Projects like simple pocket hole shelves, outlined in guides to pocket hole projects you can finish with just a drill, teach you how different drill bits feel as they cut and how screws pull joints tight. That muscle memory transfers directly to driving lag bolts into studs without stripping heads or over tightening into soft framing lumber.
Drill settings, bits, and pilot holes that keep studs intact
Once the wall layout is marked, your cordless drill becomes the star of the mount TV with cordless drill guide. Set the gearbox to low speed, usually labeled as gear 1, because this range delivers more torque and better control for drilling and driving into studs. High speed is tempting when you are impatient, but it overheats drill bits and strips screw heads before the lag bolts are fully seated.
For drilling pilot holes, match the drill bit diameter to the core of the lag, not the outer thread width. In softwood studs, a pilot that is about 60 to 70 percent of the lag diameter lets the threads bite without splitting the stud, while hardwood or old, dry framing may need a slightly larger bit to avoid cracking. Always drill straight and deep enough so the lag bolts never have to force their own path for more than a few millimeters.
Use a sharp wood drill bit for studs and a masonry bit for brick concrete or block, and never mix them up. A masonry bit in wood will burn and wander, leaving oversized holes with poor grip, while a wood bit in concrete will dull almost instantly and can overheat your cordless drill motor. If your wall type includes real masonry, a hammer drill mode or a dedicated hammer drill is almost mandatory to create clean, straight drill holes for sleeve anchors.
When you are drilling into metal studs, the rules change again. Start with a small pilot using a metal rated drill bit, then step up gradually until the hole matches the toggle bolt or anchor specification, because thin steel tears easily if you try to punch a full size hole in one pass. Keep the drill speed moderate and let the bit do the work, backing out occasionally to clear chips so you do not overheat the tools or glaze the cutting edges.
After the pilot holes are drilled, switch the cordless drill to driver mode and set the clutch to a medium high setting. Drive each lag bolt or structural screw until the washer just kisses the wall mount plate, then finish the last quarter turn with a hand tool like a socket wrench to avoid crushing the drywall surface. This combination of power and finesse keeps the mount tight against the wall without deforming the studs or stripping the fasteners.
If you plan to use your drill heavily for masonry or long mounting sessions, battery management matters. Fast chargers can get you back to work quickly, but they also heat cells more, so it is worth reading a detailed comparison of fast chargers versus standard chargers and battery life before you commit to a platform. For very large holes with clean edges in wood or metal backer plates, a specialized guide to hole saws for cordless drills can help you choose the right accessories without overloading your drill.
Step by step: from blank wall to leveled, lagged, and wired
Turn the abstract mount TV with cordless drill guide into a concrete checklist you can follow. Start by sitting in your main viewing spot and using a tape measure to mark eye level on the wall, then sketch a rectangle where the screen should appear so the mount wall position feels natural. This prevents the classic mistake of centering the wall mount on the studs instead of centering the TV on the room.
Next, run the stud finder across that area to locate each stud, marking their centers with vertical lines. Hold the wall mount bracket against the wall, align it with your marks, and use a bubble level to ensure the mounting plate is perfectly horizontal before tracing the lag bolt holes with a pencil. Double check that at least two, and ideally four, of those holes land squarely over studs so every lag has solid wood behind it.
Now pick the correct drill bit for your pilot holes based on the lag size and wall type. Drill straight through the drywall and into the stud at each mark, keeping the drill perpendicular to the wall so the bolts will seat flat against the mounting plate. If you feel the bit suddenly lose resistance after a short distance, you may have missed the stud and should stop to reassess before enlarging the holes with more drilling.
With the pilot holes ready, hold the wall mount back in place and thread the lag bolts through the bracket into the wall by hand. Switch your cordless drill to driver mode with a suitable socket adapter, then drive each lag until snug, finishing the final tightening with a socket wrench to avoid overdriving into the studs. Give the bracket a firm upward and outward pull to confirm that nothing shifts, because any movement now will only get worse once the TV is hanging.
Before hanging the screen, plan your cable management so you do not end up with a mess. Decide whether you will run a wall cable through an in wall rated kit, use surface raceways, or simply bundle the cable set neatly along the bracket, and always keep power cords separate from low voltage signal cables where possible. Many full motion wall mounts include clips or channels for cable management along the arms, which prevent the cables from binding as you extend and swivel the TV.
Finally, attach the mounting arms to the back of the TV with the supplied screws, then lift the screen onto the wall mount with a helper. Engage any safety locks or bars, check the level again, and make small adjustments if your mount allows micro leveling so the screen looks square to the room. Once everything is secure, step back and note how the same drill, bits, and bolts that felt intimidating at the start now feel like a predictable system you can reuse on shelves, cabinets, and every other project that follows.
Common mistakes, smarter hardware choices, and drill set picks
Most failed TV installs trace back to the same small set of avoidable errors. People skip the stud finder and trust drywall anchors that were never rated for a full motion arm, or they use lag bolts that are either too short to reach solid wood or so long they risk hitting hidden services. Others rush the layout, ignore the level, and end up with a crooked mount that is almost impossible to fix once the holes with oversized diameters are already in the studs.
Hardware choice is where a careful mount TV with cordless drill guide quietly saves you from future headaches. For wood studs, use proper structural lag bolts with washers, not the undersized screws that ship in many generic wall mount kits, and always match the drill bit to the manufacturer’s pilot recommendations. In metal studs or tricky wall types, invest in rated toggle bolts or specialty anchors instead of improvising with whatever came in a mixed fastener set at the bottom of your toolbox.
Another frequent oversight is failing to think about cable management until the TV is already on the wall. Plan where each wall cable will enter and exit, and consider installing a recessed box or in wall kit so HDMI and power cables do not drape visibly below the screen. If you are using a full motion mount, leave enough slack in the cable set for the arms to extend fully without pulling on the connectors or binding against the wall.
On the drill side, not all cordless drill sets are equal once you move beyond light furniture assembly. Kits like the DeWalt DCK283D2, Milwaukee 2997-22, and Makita XT269M pair brushless motors with decent chuck runout control, which matters when you are drilling precise pilot holes into narrow studs. Cheaper sets often have weaker clutches and more wobble, which can enlarge holes unintentionally and reduce the holding power of your lag bolts or structural screws.
Finally, remember that your drill is only as good as the drill bits and accessories you feed it. Keep a dedicated set of sharp wood, metal, and masonry drill bits, retire any that are visibly burned or chipped, and label them by type so you do not grab the wrong one in the middle of a mounting step. The real test of a cordless drill set is not the torque figure on the box, but whether it still sinks the tenth lag bolt cleanly at the end of a cold morning when your hands are tired and the wall feels unforgiving.
Frequently asked questions about mounting a TV with a cordless drill
Can I mount a TV directly into drywall without hitting studs ?
For any TV larger than a small bedroom screen, you should not rely on drywall alone. Drywall has very low pull out strength, so always anchor the wall mount into studs or use heavy duty, weight rated anchors specifically designed for hollow walls. When in doubt, choose a wider bracket that can span multiple studs and reduce the load on each fastener.
What drill settings should I use when driving lag bolts into studs ?
Use low speed, high torque mode on your cordless drill, usually labeled as gear 1. Set the clutch to a medium high setting so the drill can drive the lag bolts firmly without over tightening and stripping the wood fibers in the studs. Finish the last quarter turn with a hand tool like a socket wrench for better feel and control.
How do I know which drill bit to use for pilot holes ?
Match the drill bit diameter to the solid core of the lag bolt, not the outer thread width. In softwood studs, a pilot that is about two thirds of the lag diameter usually gives strong thread engagement without splitting the wood. Always check the hardware manufacturer’s chart if available, because different bolt types can require slightly different pilot sizes.
Do I need a hammer drill for mounting a TV on a brick or concrete wall ?
For solid brick or concrete, a hammer drill with masonry drill bits makes the job much faster and cleaner. Standard drills can sometimes manage shallow holes in softer masonry, but they tend to overheat and produce ragged holes that weaken anchor performance. If your wall is real brick concrete or structural block, borrowing or renting a hammer drill is usually worth the effort.
How high should I mount my TV on the wall ?
A comfortable rule of thumb is to place the center of the screen roughly at seated eye level from your main viewing position. Use a tape measure while sitting on your sofa or chair, then adjust slightly for personal preference or room layout. Always prioritize viewing comfort over perfectly matching the height of existing artwork or furniture lines.