
Understanding the basics of drill bits for cordless drill sets
What Makes a Drill Bit Essential for Your Cordless Drill Set?
When you pick up a cordless drill, the real magic happens at the tip: the drill bit. The bit is the part that actually cuts into the material, whether you’re working with wood, metal, or something else. Choosing the right drill bits for your cordless drill set is crucial for achieving clean, precise holes and getting the most out of your projects. Not all bits are created equal, and understanding their differences can help you work smarter, not harder.
Types of Drill Bits and Their Key Features
Drill bits come in a variety of shapes and materials, each designed for specific tasks. Here’s a quick overview to help you get started:
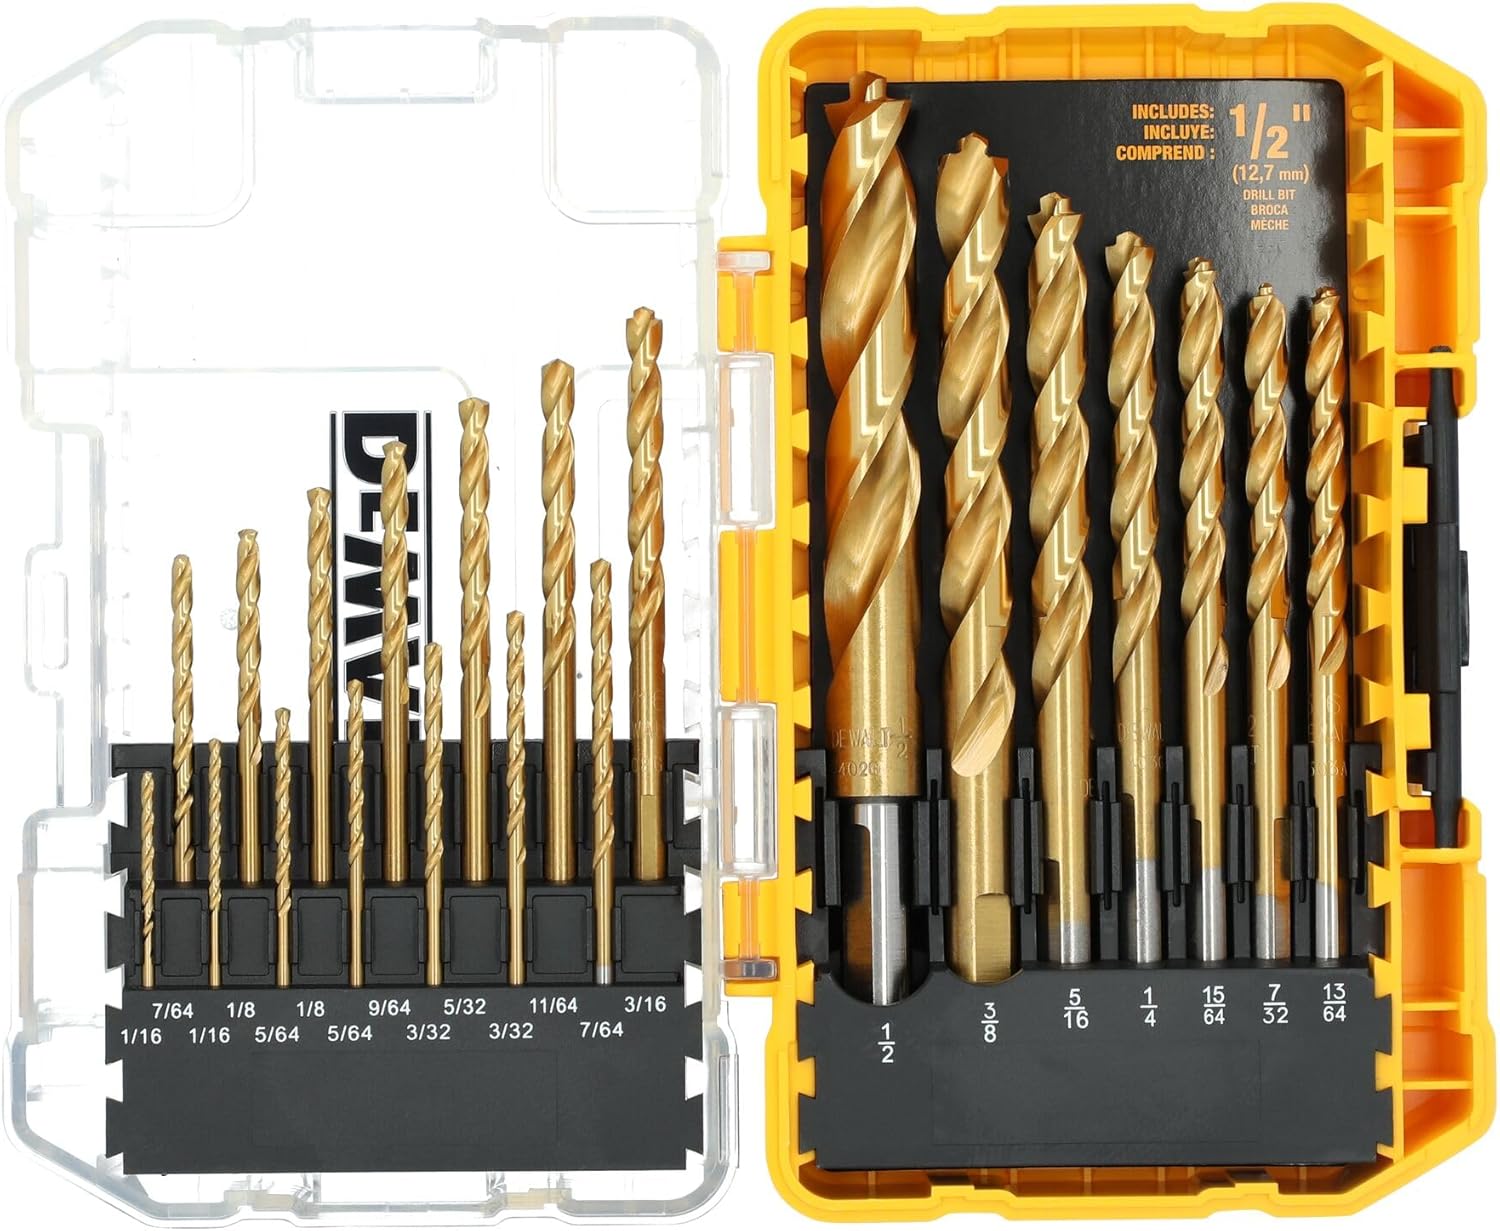
- Wood drill bits: These are often equipped with a brad point or spade design, which helps keep the bit steady and creates clean entry points in wood. Auger bits are another type, ideal for deeper holes in wood.
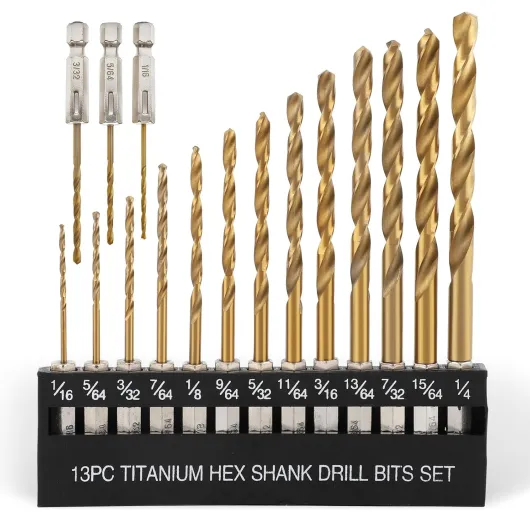
- Metal drill bits: Typically made from high-speed steel or cobalt, these bits feature a split point design to prevent wandering and allow for efficient cutting through tough materials like steel or aluminum.
- Multi-purpose bits: Some bits are designed to handle both wood and metal, but for the best results, it’s wise to use bits designed specifically for the material you’re working with.
Why Bit Material and Design Matter
The material and point design of your drill bit directly affect its performance. For example, a brad point on a wood drill bit helps create precise holes in soft or hard woods, while a split point on a metal drill bit ensures accuracy and reduces slippage on metal surfaces. The cutting edges and overall design also determine how quickly and cleanly the bit can drill through your chosen material.
Matching the Right Bit to Your Project
Whether you’re a handyman tackling home repairs or an expert working on detailed projects, knowing which bit to use is the first step to success. The rest of this article will help you identify the key differences between wood and metal drill bits, guide you on when to use each type, and offer tips for safety and maintenance. If you’re looking to expand your set, check out this guide to choosing the right drill bit hex set for your cordless drill for more expert advice.
Key differences between wood and metal drill bits
Comparing Drill Bit Designs and Materials
When selecting the right bit for your cordless drill set, understanding the differences between wood and metal drill bits is crucial. Each type is engineered for specific materials and projects, and using the wrong one can lead to poor results or even damage your tools.
- Material and Construction: Wood drill bits are typically made from high-carbon steel, which is ideal for drilling wood and other soft materials. Metal drill bits, on the other hand, are often crafted from high-speed steel (HSS) or cobalt alloys, making them tough enough to cut through harder materials like steel and aluminum.
- Point Design: The tip of a wood drill bit usually features a brad point or spur, which helps the bit stay centered and start clean holes in wood. Auger bits and spade bits are also common for wood, each offering unique advantages for different types of holes. Metal drill bits often use a split point design, which reduces wandering and allows for precise holes in metal surfaces.
- Cutting Edges: Wood bits have sharp cutting edges designed to slice through fibers cleanly, minimizing splintering. Metal bits are engineered with a more robust cutting edge and a steeper angle, allowing them to grind through tough metals efficiently.
- Speed and Application: Drilling wood generally requires higher speeds, while metal drilling is best done at slower speeds to prevent overheating and dulling of the bit. Choosing the right speed and bit type for your material working needs will help you achieve expert results and extend the life of your drill bits.
For those looking to expand their toolkit, understanding these differences will help you pick the right types of drill bits and accessories for your cordless drill set. This knowledge is essential for any handyman or DIY enthusiast aiming for precise, clean holes in both wood and metal projects.

- + Versatile: Suitable for plastic, wood, and metal
- + Sharp Points: 135 Degree Split Point for efficient drilling
- + Durability: Made for long-lasting use
- + Easy Handling: 3-Flats Shank design prevents slipping
When to use wood drill bits with your cordless drill
Best practices for drilling into wood with your cordless drill
When working on wood projects, choosing the right drill bit is essential for clean, precise holes and efficient work. Wood drill bits are specifically designed for materials like softwood, hardwood, plywood, and MDF. Their point design, often a brad point or spur, helps the bit stay centered and reduces wandering as you start drilling. This is especially important for handymen and DIYers who want professional-looking results without splintering or rough edges.
- Bit type matters: For most wood drilling, brad point bits and spade bits are commonly used. Brad point bits are ideal for accurate, clean holes, while spade bits are better for larger diameter holes in softer woods.
- Speed and pressure: Use a moderate speed setting on your cordless drill. Too much speed can burn the wood, while too little may cause splintering. Apply steady, gentle pressure to let the bit do the cutting.
- Material working: Always match the bit to the wood type. Hardwoods require sharper, more robust bits, while softwoods are more forgiving. Dull bits can tear the wood fibers, so check your bits regularly.
- Step-by-step approach: For deep holes, drill in short steps, pulling the bit out occasionally to clear wood chips. This prevents clogging and overheating, which can damage both the bit and the wood.
- Cutting edges: Bits designed for wood have cutting spurs on the edges to create clean entry and exit points. This helps avoid rough holes and minimizes the need for sanding.
Remember, using a metal drill bit on wood can work in a pinch, but it won't deliver the same clean results as a bit designed for wood. If you’re interested in tackling more challenging materials, like tile, check out this expert guide to drilling into tile with cordless drills for step-by-step help.
Understanding the differences in bit design and material will help you get the most from your cordless drill set, ensuring your wood projects look sharp and professional.
When to use metal drill bits with your cordless drill
Best Practices for Drilling into Metal with Cordless Drill Sets
Drilling into metal requires a different approach compared to working with wood. The material is denser and harder, so the drill bits and techniques you use must be suited for the task. Here are some expert tips to help you achieve clean, precise holes in metal using your cordless drill set:
- Choose the right bit type: Use bits designed specifically for metal, such as high-speed steel (HSS) or cobalt drill bits. These bits have a split point design that helps prevent wandering and allows for efficient cutting into tough materials.
- Control your speed: Drilling metal requires a slower speed than wood. High speeds can overheat the bit and dull the cutting edges. Start slow and increase speed only if the bit is cutting smoothly.
- Apply steady pressure: Let the bit do the work. Too much force can cause the bit to slip or break, especially when working with harder metals.
- Lubricate the bit: Using a drop of oil on the bit helps reduce friction and heat, extending the life of your drill bits and ensuring cleaner holes.
- Secure your material: Always clamp the metal piece firmly before drilling. This prevents movement and helps you maintain control over the drill and bit.
Metal drill bits are easy to identify in your set. They are usually slimmer and have a more pointed tip compared to wood bits, which often feature a brad point or spade design. If you are unsure, check the markings on the bit or refer to the manufacturer's guide included with your cordless drill set.
Remember, using the correct type of bit for metal not only improves your results but also protects your cordless drill from unnecessary wear. For more information on identifying and choosing the right drill bits for different materials, read the related article on mastering the basics of using an electric drill.
How to identify wood versus metal drill bits in your set
Spotting the Differences: Visual and Physical Clues
When you open your cordless drill set, it can be tricky to tell wood drill bits from metal drill bits at a glance. However, a closer look at their design and features will help you quickly identify the right bit for your project. Here are some expert tips to help you distinguish between them:
- Tip Shape and Point Design: Wood drill bits often feature a sharp, pointed tip called a brad point. This helps the bit stay centered when drilling into wood, making it easier to start holes precisely. In contrast, metal drill bits usually have a flatter, angled tip known as a split point, designed for cutting into harder materials like steel or aluminum.
- Cutting Edges and Flutes: Wood bits, especially spade bits and auger bits, have wide, open flutes to quickly remove wood chips. Metal bits have narrower, spiral flutes that help control heat and remove metal shavings efficiently.
- Material and Finish: Metal drill bits are typically made from high-speed steel (HSS) or cobalt and may have a black oxide or titanium coating for durability. Wood bits are often made from carbon steel and may not have a special coating.
- Size and Length: Auger bits for wood are usually longer and thicker, designed for deep holes in materials like timber. Metal bits are generally shorter and more robust to withstand the stress of drilling through metal.
Quick Reference Table: Wood vs. Metal Drill Bits
| Feature | Wood Drill Bits | Metal Drill Bits |
|---|---|---|
| Tip/Point Design | Brad point, spade, auger | Split point, flatter angle |
| Material | Carbon steel | High-speed steel, cobalt |
| Flute Shape | Wide, open for chip removal | Narrow, spiral for metal shavings |
| Coating | Usually uncoated | Black oxide, titanium, or cobalt |
| Common Uses | Drilling wood, soft materials | Drilling metal, hard materials |
Practical Steps for the Handyman
If you are unsure about the type of bit in your set, try these steps:
- Read the markings on the shank—manufacturers often label bits for wood or metal.
- Check the point: a sharp, central spike is a sign of a wood bit, while a flatter, angled tip is typical for metal bits.
- Feel the weight and finish—metal bits are usually heavier and have a smoother, coated surface.
Knowing how to identify the right drill bit will help you achieve precise holes and protect both your cordless drill and your materials. This step is essential for anyone working on projects involving wood, metal, or both.
Safety and maintenance tips for drill bits and cordless drills
Essential Safety Practices for Drilling
When working with any cordless drill set, safety should always come first. Whether you’re drilling wood or metal, using the right bit and technique can help prevent accidents and ensure your projects go smoothly. Here are some practical steps to keep in mind:
- Always wear protective eyewear to shield your eyes from flying debris, especially when drilling metal or harder materials.
- Secure your workpiece firmly using clamps or a vise. This prevents movement and helps you drill precise holes.
- Check that your drill bit is properly seated and tightened in the chuck before starting. Loose bits can slip and cause injury.
- Use the correct speed setting for the material. Lower speeds are best for metal, while higher speeds suit wood. This helps the bit cut efficiently and reduces wear.
- Never force the drill. Let the bit do the cutting. Applying too much pressure can break the bit or damage your cordless drill.
Maintaining Your Drill Bits and Cordless Drill
Proper maintenance extends the life of your drill bits and cordless drill, ensuring reliable performance for all your projects. Here’s what every handyman and DIY enthusiast should do:
- Clean bits after each use. Remove wood shavings, metal filings, and dust to prevent buildup that can dull cutting edges.
- Inspect bits for wear, especially the point and cutting edges. Replace any that are chipped, bent, or dull to maintain precise holes and safe operation.
- Store bits in a dry, organized case to avoid rust and keep types of drill bits easy to find. Moisture can damage both wood and metal drill bits.
- Lubricate metal drill bits with a drop of oil before drilling into harder metals. This reduces friction and heat, helping the bit last longer.
- Periodically check your cordless drill for battery health, chuck tightness, and smooth operation. A well-maintained drill helps you work safely and efficiently.
Recognizing the Right Bit for the Material
Using the correct bit for the material you’re working with is not just about performance—it’s also about safety. Bits designed for wood, like brad point or spade bits, have a different point design and cutting profile than those made for metal, such as split point bits. Using a bit wood for metal, or vice versa, can lead to poor results and even damage your tools. Always read the markings or check the design features to ensure you’re using the right type for your project.