Understanding the Challenges of Drilling into Tile
Facing the Tough Task of Drilling into Tile
Drilling into tile is not as straightforward as it might seem. Unlike wood or plaster, tiles such as ceramic, porcelain, marble, and granite present a unique challenge due to their fragile yet hard nature. Without the right approach and tools, you risk shattering these materials, ruining your project, or even damaging your drill equipment. Tiles are chosen for their durability and aesthetic appeal. However, qualities that make them suitable for flooring and walls also make them resistant to penetration. Understanding the material you are dealing with is the first step towards success. For instance, porcelain tile is denser and more challenging to drill than ceramic tile, which can influence the type of drill bit you'll need.Challenges and Considerations
- Material Hardness: Different types of tiles like ceramic tile, porcelain ceramic, and granite marble each have distinct hardness levels, impacting how you approach the task.
- Fragility: Despite their toughness, tiles can crack or shatter when mishandled, particularly if too much force is applied.
- Overheating: Both the drill and drill bit are at risk of overheating due to friction when drilling through hard surfaces like tiles.
- Dust and Debris: Drilling into tile produces fine dust and debris, which can be a nuisance and health hazard if not managed properly.
Choosing the Right Cordless Drill for Tile Work
Choosing the Ultimate Tool for Tile Drilling
Embarking on the task of drilling through tiles requires a precise selection of tools, particularly the cordless drill. Opting for the right drill is paramount to ensure efficiency and avoid cracks in delicate materials like ceramic, porcelain, and marble. Consideration of the drill's power and settings can be crucial in tackling resilient surfaces such as granite. Many homeowners and professionals opt for a cordless drill due to its flexibility and portability.
When choosing your drill, take note of its torque settings. A higher torque will provide the necessary power to go through sturdier tiles, such as granite and porcelain ceramic. Another key feature to consider is the presence of a hammer setting, which although commonly found in corded versions, can be a lifesaver in cordless models when dealing with harder surfaces like stone or marble granite.
Price can also play a pivotal role in making your decision. While it's tempting to cut costs by choosing a cheaper option, investing in a high-quality cordless drill can save you from potential mishaps like tile cracking—a mistake often made by many. Look for reputable brands that offer value in terms of durability and performance. A drill with a brushless motor is highly recommended, offering efficiency and longevity, particularly valuable when investing in a whole drill bit set for multiple projects.
Weight and ergonomics shouldn't be overlooked either. A lightweight drill can improve manageability, particularly when working on a set of tiles for extended periods. Consider models that come with smart storage solutions or integrate compact design for ease of use in tight spaces.
Lastly, check compatibility with various drill bits, especially if you're planning to use diamond drill sets or diamond core bits for intricate work on materials like glass tile or porcelain tiles. Proper combination of the right cordless drill and drill bits can make your task seamless and efficient, allowing for precise and clean drilling, every time.
Selecting the Best Drill Bits for Tile
Selecting the Ideal Drill Bits for Tile Precision
When it comes to drilling into various tile surfaces, choosing the right drill bit is crucial for achieving clean results and avoiding damage. Tiles, whether ceramic, glass, porcelain, or stone like marble and granite, require specific bits designed to tackle their hardness and density efficiently.- Diamond Drill Bits: These are the go-to choice when working with tiles like ceramic tile, porcelain ceramic, and porcelain tile. Known for their durability and cutting power, diamond drill bits come in different varieties such as dry diamond and diamond core bits. Investing in a high-quality bit set tailored for tile can save you time and effort by ensuring a precise hole with minimal chipping.
- Shdiatool Diamond Drill Bits: For those frequently handling more delicate tiles like thin porcelain or glass tile, shdiatool diamond bits are particularly effective. Available in sets measured in inches like the 5 pcs core drill set, they are specifically engineered to create a smooth diamond hole without overheating or causing cracks.
- Core Bits for Dense Materials: Drilling into dense materials such as granite marble or ceramic marble demands core bits. These bits focus on removing a core of material to navigate the tile’s resilience while maintaining the integrity of the surrounding material.
Step-by-Step Guide to Drilling into Tile
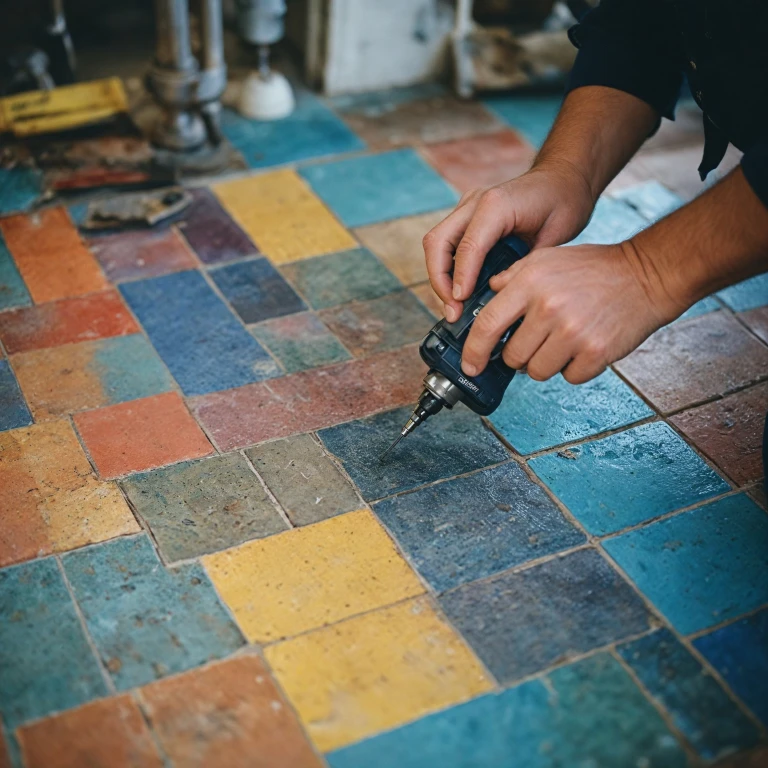
Drill Slowly and Steadily
To begin drilling into tile, start slowly. Maintain a steady pace to prevent the drill bit from overheating or causing cracks on the surface. This is critical, especially when working with fragile materials such as ceramic tile or glass tile. If the drill features speed settings, utilize the slower speeds for initial penetration, particularly when using diamond drill bits, which are designed to be effective on harder surfaces like porcelain or marble.Use Water as a Cooling Agent
During the drilling process, applying water serves as a lubricant and cooling agent, helping to preserve the life of the drill bit. This technique reduces friction and heat, preventing damage to both tile and drill bit. Keep a moist sponge or a spray bottle nearby to keep the drilling area adequately dampened, particularly when handling dry diamond bits on hard surfaces like granite marble.Focus on Proper Alignment
Ensuring that the bit and drill are precisely aligned is crucial for creating a clean hole. Misalignment can lead to chips or crooked drilling, especially when using core drill bits. To maintain control, use both hands to steady the drill, guiding the diamond drill or core bits as straight as possible. For larger holes, consider using a guide to stabilize your grip and manage torque effectively.Apply Gentle Pressure
Excessive force can damage the tile or cause the drill bit to slip. Use even, gentle pressure to allow the diamond hole bit to cut through the material without creating undue stress. With delicate materials like porcelain ceramic, gradual pressure prevents the possibility of breaking or cracking the tile.Depth Management
While drilling, it is advisable to have a clear understanding of how deep the hole should be, regardless of whether you're working on ceramic marble or porcelain tile. Mark the drill bit with tape or use a stop to monitor the depth, ensuring precision and preventing over-penetration. Following these guidelines will help you to effectively drill into tile, preventing costly errors and extending the bit set's lifespan. Avoid common mistakes by patiently maneuvering the drill while being mindful of the material's characteristics.Common Mistakes to Avoid When Drilling into Tile
Avoiding Frequent Pitfalls When Drilling into Tile
Drilling into tile can be a straightforward task if approached correctly, yet there are common missteps that could prevent a smooth process. Being aware of these pitfalls will help ensure your project is a success without causing unnecessary damage or wasting resources.
- Skipping the Right Tools: Starting your project without selecting the appropriate tile drill bit or diamond drill set can compromise the quality of your work. Always go for high-quality diamond core bits particularly when dealing with ceramic tile or porcelain tile.
- Rushing the Process: Drill with care. Apply steady, controlled pressure to avoid damaging the tile. Rushing can lead to cracks or chips, especially with granite marble or glass tile.
- Incorrect Speed Settings: When working with a drill, select a low speed to maintain control and avoid overheating. This is crucial when using diamond bits as higher speeds may wear the bits set prematurely.
- Miscalculating Pressure: Applying too much force can cause the hole to splinter. Gentle pressure, especially with a shdiatool diamond bit, will save you the agony of damaged tiles.
- Failing to Cool the Drill Bit: Without adequate cooling, your dry diamond drill bit might overheat. It’s a good idea to regularly pause your drilling to let the bits porcelain cool down, even if you’re using a dry diamond core bit.
- Improper Setup: Make sure your work area is stable and well-lit. A shaky setup can easily lead to mistakes, especially when handling sensitive materials like ceramic marble or porcelain ceramic.
- Overlooking Drill Maintenance: Regularly maintain your cordless drill to ensure optimal performance. Mismanaged tools can complicate projects, and proper maintenance helps prolong the life of your drill bits.
Avoiding these common errors can save you time and money while ensuring your project results in clean, professional holes through the toughest of materials, whether you're working with a complex shdiatool or a basic drill bit set.
Maintaining Your Cordless Drill for Optimal Performance
Ensuring Your Cordless Drill Lasts
Regular maintenance of your cordless drill is essential to keep it in top shape, especially after drilling into materials like ceramic or porcelain tile. Here are some tips to ensure optimal performance:- Clean the Drill Regularly: After each use, particularly when working with tile, remove debris and dust that can accumulate around the drill. Use a dry cloth to wipe down the exterior and avoid getting moisture into sensitive areas.
- Check the Drill Bits: Inspect your diamond drill bits for any wear and tear. Bits used for drilling glass, porcelain, or granite can wear down quickly, especially if used improperly. Replace any that are damaged or no longer efficient.
- Inspect the Battery: A robust battery is crucial for cordless drills. Ensure it's charging correctly and hold enough power for prolonged tasks. Avoid deep discharges that can shorten its lifespan.
- Lubricate Moving Parts: Regular lubrication of your drill’s moving parts can prevent wear and tear, thereby extending its lifespan. Consult the drill's manual for recommended practices.
- Store Properly: Store your drill and bit set in a clean, dry place. This protects against rust, especially for diamond bits or sets used for dry drilling.
- Use the Right Settings: Adjust settings when working with different materials. A softer tile like ceramic requires different torque settings compared to hard granite or marble.
